1. Gradle安装
1.1 下载
下载地址:
https://services.gradle.org/distributions/
要根据开发工具选择对应版本,例如idea 2018,gradle只能选择5.7以下版本
1.2 配置环境变量
新建环境变量 GRADLE_HOME,即E:\dev\gradle-5.6.4

修改环境变量 Path,即追加 %GRADLE_HOME%\bin

设置本地仓库目录
GRADLE_USER_HOME=D:\gradle\repo
验证:
gradle -v

1.3 Idea配置gradle

1.4 仓库下载地址全局配置
在gradle安装目录下的init.d目录下创建init.gradle
E:\dev\gradle-5.6.4\init.d
添加全局仓库配置后,在gradle工程不需要再配置依赖包下载地址

2. Gradle 使用
2.1 Gradle下载的依赖jar包路径位置
GRADLE_USER_HOME/caches/modules-2/files-2.1
2.2 Gradle 强制依赖
在build.gradle中添加如下配置:
configurations.all {
    resolutionStrategy {
        force 'com.github.bumptech.glide:glide:4.2.0'
        force 'com.github.bumptech.glide:compiler:4.2.0'
    }
}
其他方式:
compile('com.squareup.okhttp:okhttp-mt:2.5.0') {
     force = true
}
2.3 Gradle 移除依赖
1.直接在configuration中排除
configurations {
    compile.exclude module: 'commons'
    all*.exclude group: 'org.gradle.test.excludes', module: 'reports'
}
2.在具体的某个dependency中排除
dependencies {
    compile("org.gradle.test.excludes:api:1.0") {
        exclude module: 'shared'
    }
}
2.4 Gradle mybatis逆向工程
参考:
https://segmentfault.com/a/1190000013534059
https://www.jianshu.com/p/57ba8e9fccca
1、build.gradle配置
buildscript {
    ext {
        //spring boot 版本
        bootVersion = '2.3.2.RELEASE'
    }

    //springboot gradle插件配置
    dependencies {
        classpath("org.springframework.boot:spring-boot-gradle-plugin:${bootVersion}")
        // mybatis-generator 插件路径
//        classpath "gradle.plugin.com.arenagod.gradle:mybatis-generator-plugin:1.4"
        classpath "gradle.plugin.com.thinkimi.gradle:mybatis-generator-plugin:2.2"
    }
}

//引入 mybatis-generator 插件
//apply plugin: "com.arenagod.gradle.MybatisGenerator"
apply plugin: "com.thinkimi.gradle.MybatisGenerator"
引入mybatis-generator-plugin,上面两个插件都可以,第一个插件比较旧2017年的,第二个插件有继续维护
2、Mybatis所需包引入,需要用mybatisGenerator引入,否则执行逆向工程时,会报找不到包错误
//逆向工程所需jar
mybatisGenerator 'mysql:mysql-connector-java:8.0.12'
//mybatis-generator core 包
mybatisGenerator group: 'org.mybatis.generator', name: 'mybatis-generator-core', version:'1.3.7'
// https://github.com/itfsw/mybatis-generator-plugin
mybatisGenerator group: 'com.itfsw', name: 'mybatis-generator-plugin', version:'1.3.8'
mybatisGenerator group: 'tk.mybatis', name: 'mapper', version:'4.1.5'
3、指定generator xml位置
configurations {
    mybatisGenerator
}
// mybatis-generator.xml 配置路径
//这里会遇到个问题:MyBatis Generator 通过xml生成,有日志但是没有生成文件成功的问题,
//原因:mac下是找不到 ./src 路径的,需要全路径,如下配置。windows则为src/main/resources/mybatis-generator.xml
mybatisGenerator {
    verbose = true
    // 不覆盖
    overwrite = false
    configFile = 'src/main/resources/mybatis-generator.xml'
}
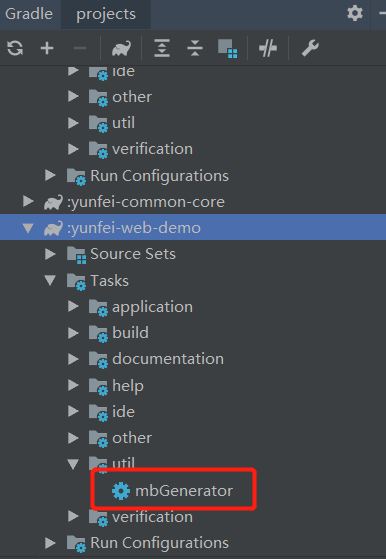
4、执行mbGenerator

5、完整配置文件
mybatis-generator-comment.ftl配置文件
3. 常见错误
3.1 Gradle springboot 多模块打包错误
gradle springboot 多模块,在父模块执行bootJar,报错Main class name has not been configured and it could not be resolved
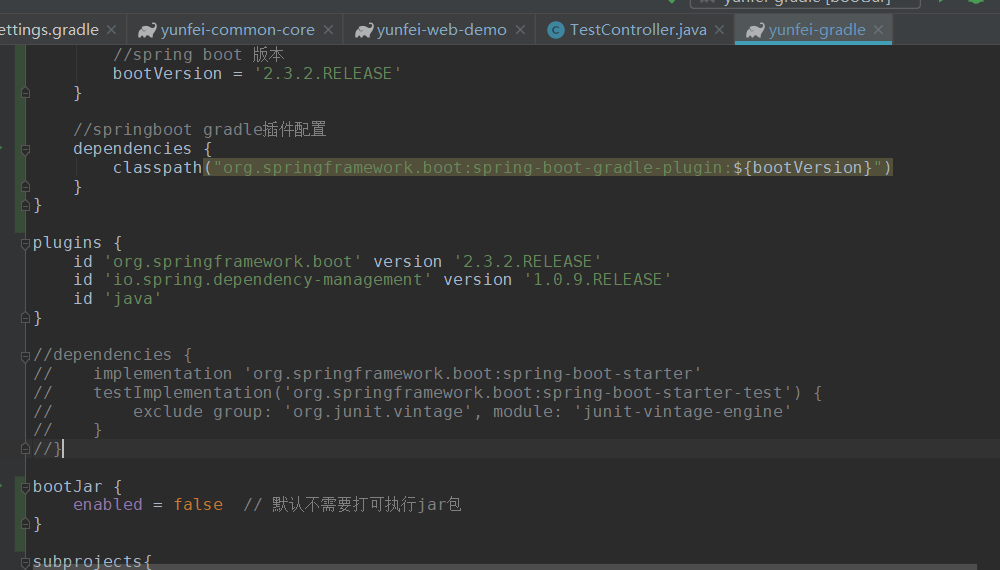
解决如下: 在父模块build.gradle文件里添加
bootJar {
    enabled = false  // 默认不需要打可执行jar包
}
子模块如果不需要打成可执行jar包,在子模块的build.gradle配置文件中添加以上配置

子模块打jar包公共配置,在父build.gradle中添加
jar { enabled = true}

参考:
https://www.jianshu.com/p/439a8b6a7617
https://blog.csdn.net/qq_43813937/article/details/106869813
https://blog.csdn.net/zekeTao/article/details/79525200
https://blog.csdn.net/chuxia5636/article/details/100684220
3.2 Gradle lombok使用错误
链接:https://www.orchome.com/1621 1、确认idea安装了lombok插件 2、Gradle配置文件添加如下配置
    annotationProcessor 'org.projectlombok:lombok:1.18.10'
    compile 'org.projectlombok:lombok:1.18.10'
//    testCompileOnly 'org.projectlombok:lombok:1.18.10'
//    testAnnotationProcessor 'org.projectlombok:lombok:1.18.10'
如果不添加annotationProcessor ,打包会报错,找不到get、set方法
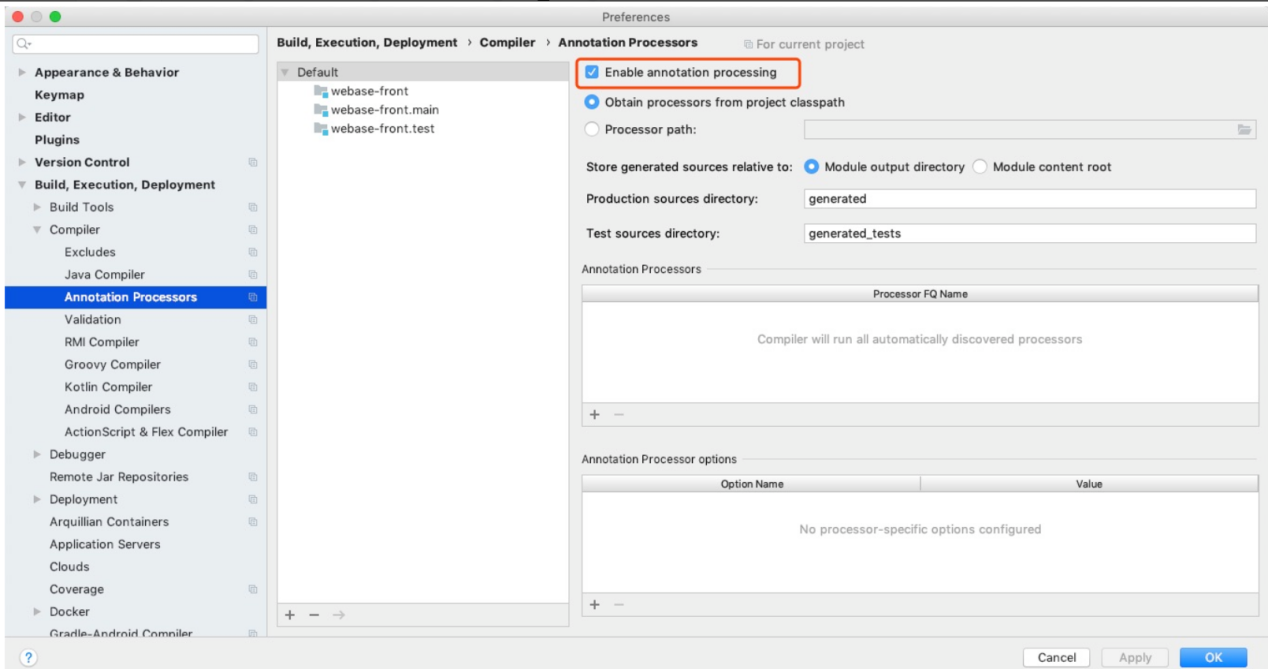
3、在Settings设置页面,我们点击Build,Execution,Deployment –> 选择Compiler–> 选中Annotation Processors,然后在右侧勾选Enable annotation processing即可

3.3 Idea 无法启动gradle项目
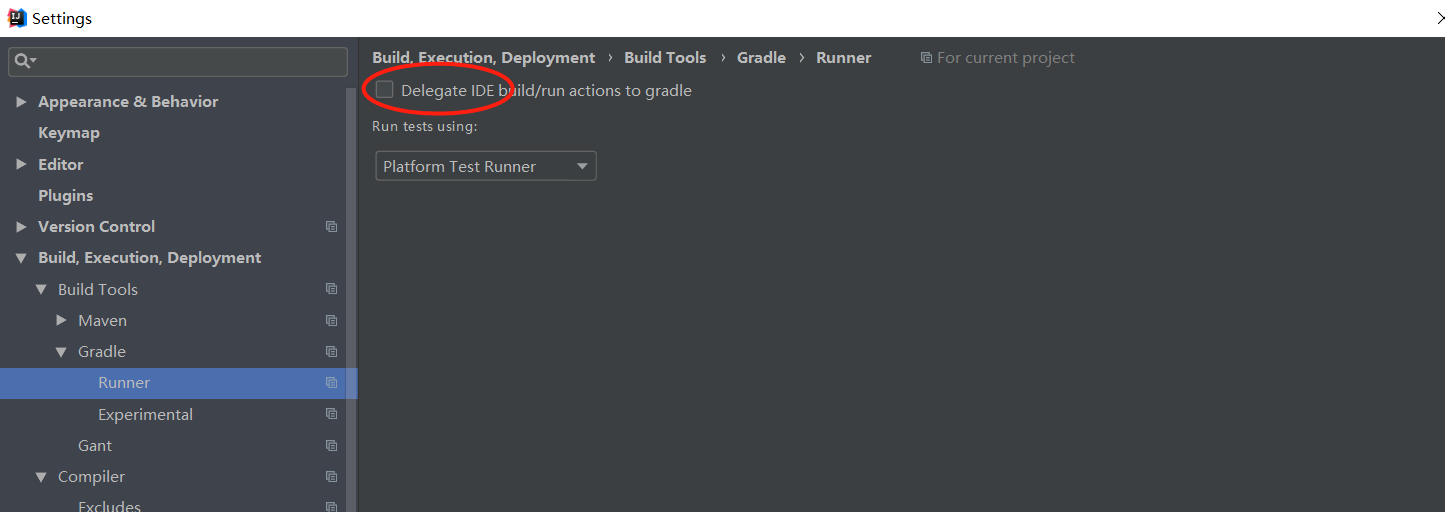
检查build tools>Gradle>Runner Delegate IDE有没有打勾,有打勾去掉,就可以正常启动项目

4. 常见问题
4.1 Gradle buildScript
在编写Gradle脚本的时候,在build.gradle文件中经常看到这样的代码:
buildScript {
    repositories {
         mavenCentral()
    }
}

repositories {
     mavenCentral()
}
buildscript中的声明是gradle脚本自身需要使用的资源。可以声明的资源包括依赖项、第三方插件、maven仓库地址等。
而在build.gradle文件中直接声明的依赖项、仓库地址等信息是项目自身需要的资源。

buildscript代码块中的repositories和dependencies的使用方式与直接在build.gradle文件中的使用方式几乎完全一样。
唯一不同之处是在buildscript代码块中你可以对dependencies使用classpath声明。该classpath声明说明了在执行其余的build脚本时,
class loader可以使用这些你提供的依赖项。这也正是我们使用buildscript代码块的目的。
